The art of creating a beautiful gallery wall. Yes, it’s an art form because apparently, it’s A LOT harder than it seems. Learn from my mistakes and achieve that model-home-worthy gallery wall by following these tips.
Most gallery walls are either:
- Your own photograph, art, and frames or
- Purchased curated prints

1) Collection
Start by collecting all the things you love and want to potentially include in your gallery wall. From original art, to handmade prints, to photographs! Consider if you want to keep everything the same size and textures or mix it up. Find inspiration online, at coffee shops and restaurants, or even scope out a model home!
2) Create a Theme
Once you’ve gathered all your gallery wall elements, group them by themes, e.g. people, places, things, or any category mix that means something to you. For art and prints, try to select colors that go with the room.
A good rule of thumb is to repeat colors at least 2-3 Times. If you’re shopping for mostly new art for your gallery wall, it is easiest to pick a color palette and stick to it. But if you’re pairing art you already have, try to repeat colors across your pieces 2-3 times to tie everything together. That is to say, not every piece needs to have the same color(s) as the next, but every piece should have 1-2 other pieces that share a similar color or tone to it.
At the end of the day – pick what makes you happy! It’s your home and it should bring you joy.
3) Evens or Odds
Next, decide whether an even number or odd number of elements will be best. Even numbers work better for regimented groups of the same size elements. Odd numbers work better when achieving the more ‘random’ look of elements.
4) Frames
Time to consider frames. Do you want them to blend in or contrast? Do you want them to match or be a variety of colors or textures? White or neutral frames are perfect for scandi-style interiors while black is great for contemporary or industrial interiors.
PRO TIP: collect different style frames in the same color! This adds interest without detracting from the art itself.
5) Measure it and Layout
Time to measure your wall space and lay your collection on the floor. Do you want neat rows or an organic arrangement? How do they look laid out together? Is there anything that jumps out as wrong or awkward? If yes, take it out! Or maybe you actually need to ADD a few more elements to complete the gallery.
There is no right or wrong! Just see what you like. PRO TIP: take photos as you adjust your collection to compare/contrast or just to remember a previously tested layout.
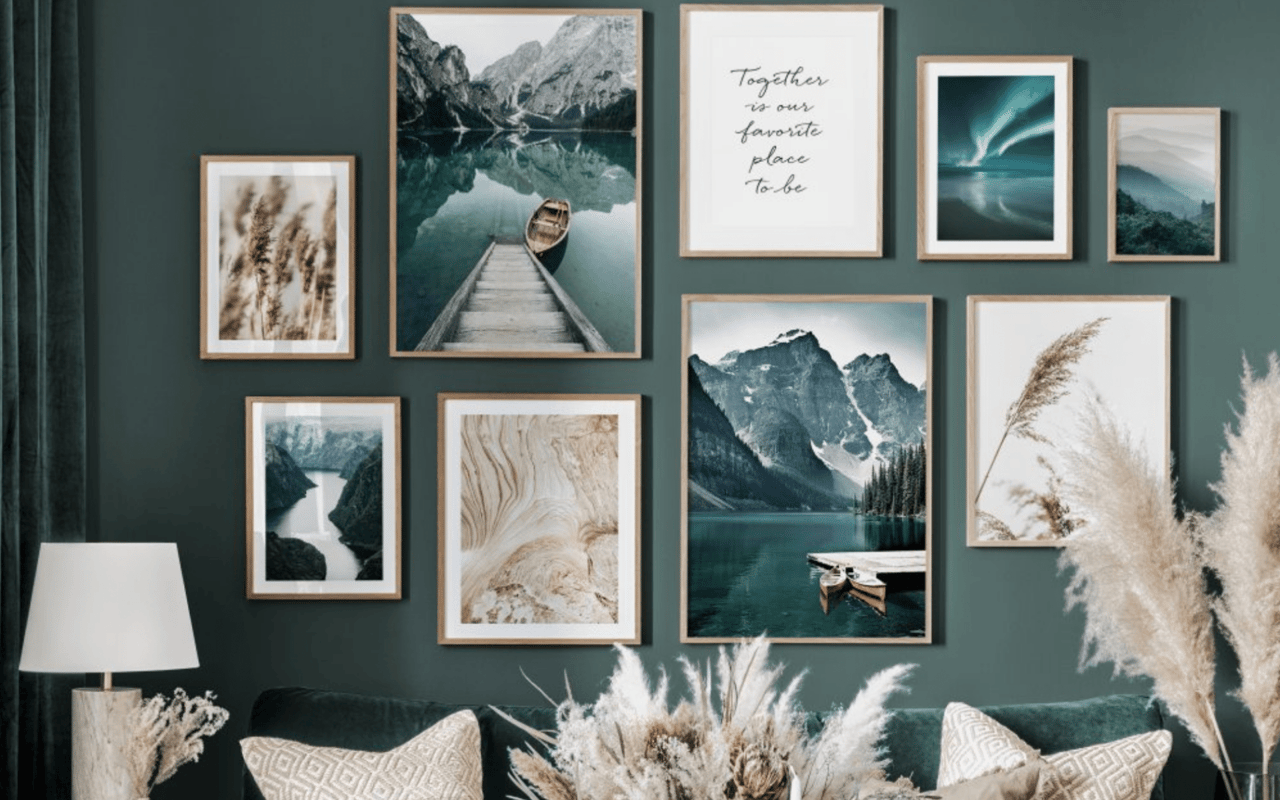
Here are some inspo photos:

6) Hang it up!
Once you’ve finalized your layout it’s time to start hanging the gallery! You can use command strips, or traditional hammer and nails. Regardless, you’ll need: a pencil, eraser, and a ruler.
A paper template may help with the process, especially for first-timers.
Draw lightly on the walls where the corners and centers of the frames will be. Mark where your nail needs to go (if needed) and get to hammering.
Now sit back, relax, and enjoy your beautiful creation.